
MTProto Proxy for Telegram: Complete Setup Guide (2026)
19.07.2026 4 min
Ideal for business houses in search of versatile account management, DICloak Antidetect Browser is also ideal for expedient customization of enterprise solutions. The highly sophisticated profile management system helps business houses enhance productivity, maintain digital identity integrity, and enable sales at scale.
DICloak Antidetect Browser is a commercial antidetect browser solution aimed at providing business with safe, horizontally scalable multi-account management software. By using sophisticated AI-based browser fingerprinting technology, DICloak Antidetect Browser helps business entities manage multiple accounts in safety, evade detection or bans, and optimize their workflow with improved efficiency.
Developed for marketers, e-commerce teams, affiliate specialists, and social media specialists, DICloak Antidetect Browser provides distinct browser profiles working in distinct spheres and, thereby, keeps account usage hidden and secure. The profiles possess distinct digital fingerprints, such as customizable IPs, device, and user agents, and enable the user to stay anonymous and handle intricate operations easily.
To keep the IP constant for the duration of your session, utilize the parameter from your proxy username, particularly in the case of using ProxyWing residential proxies, which automatically rotate IPs.
ProxyWing proxies can easily be integrated with DICloak Antidetect Browser. We’ll have you started in no time:
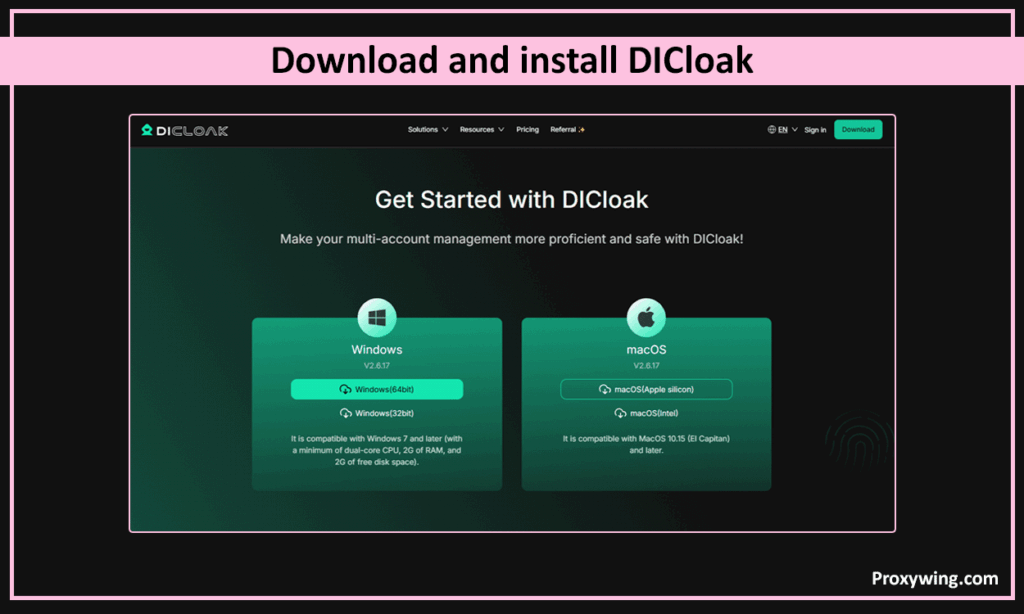
Create DICloak account and go to DICloak Antidetect Browser download page and download and install the program.
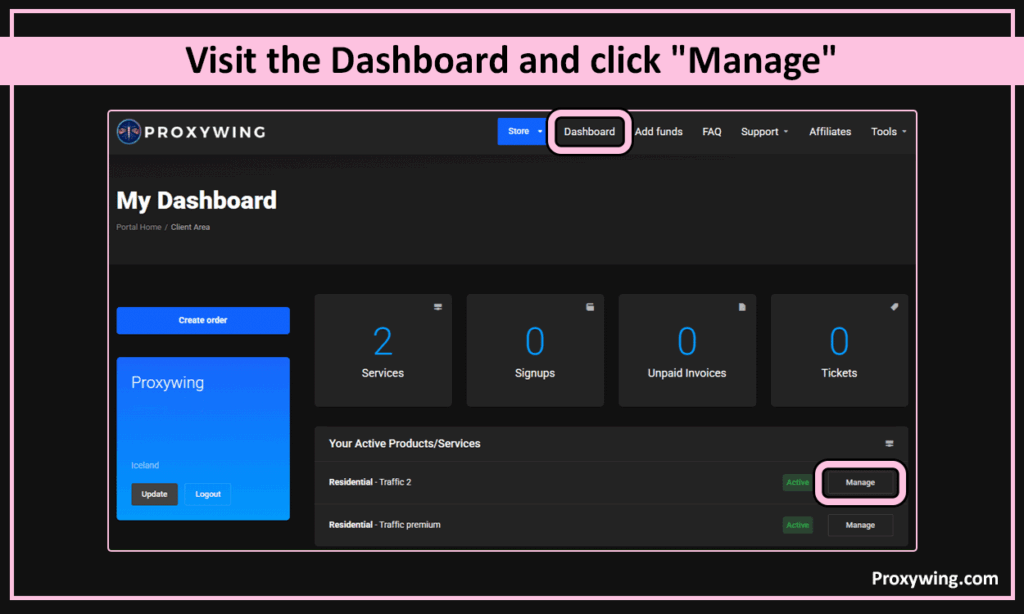
Visit the Dashboard and click on the ongoing residential tariff to generated the proxy details.
Once you have installed the app, open it and click on «Create Profile» to create a initial browser profile. A pre-existing browser profile will automatically pop up for new users. You can click on «Edit» and modify the profile information as well.

Configure now your ProxyWing proxy. All proxies in Proxywing are presented in the format: HOST:PORT:LOG:PASS. Once you have generated the proxies, you will receive the connection details. Let’s take a closer look at them:
premium.proxywing.com:54321:qz4t7kh1d8:2w0hcyvpbo_country-ao
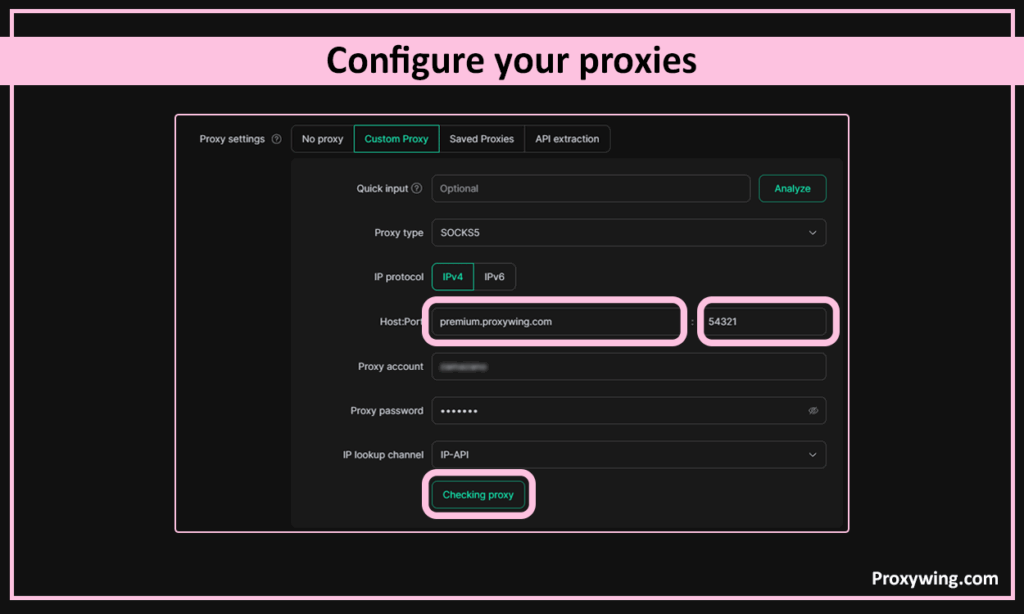
Click Check Proxy to make sure it’s all working. Once you have set everything up, click on Confirm to implement your setting.

Click on «Open» to open your web browser with the set proxy settings. And you’re done. You’ve integrated ProxyWing proxies into DICloak Antidetect Browser and you’re good to go.

That’s it! You’ve successfully integrated ProxyWing proxies with DICloak Antidetect Browser, and you’re ready to go.
Article written by:

Product & Support Operations Lead
Maksimilian built Proxywing's support function from the ground up, turning ad-hoc processes into a structured, self-sufficient department with documented workflows, clear escalation paths, and consistent service quality. Today he operates as the coordination layer between the CEO and engineering teams, translating business priorities into actionable tasks and keeping proxy infrastructure projects on track. His academic background in psychology — with formal training in research methodology and data analysis — sharpens his approach to process design and user feedback interpretation. Outside of work, Maksimilian explores the intersections of human behavior, decision-making, and product thinking.
All articles by author (62)
