Manual Proxy Setup for WiFi: How to Configure It Step by Step
21.07.2026 12 min
Using proxies is a reliable way to access the internet without limitations while keeping your connection private and anonymous. If you’re using an Android device, configuring a proxy on your device is pretty easy. Setting a proxy server for Android can be done in just a few minutes if you follow the steps we will share in this guide.
In this guide, we will walk you through all the steps for setting up Android proxy settings using three common methods. You can choose any of the three methods depending on your situation. So, without further ado, let’s dive into the configuration options for proxies on devices with Google software.
Not all setup methods work the same way on Android. The table below summarises the three options covered in this guide so you can pick the right one before you start:
| Method | Best for | Authentication | Works for apps | Protocols supported |
| Wi-Fi (built-in) | Browser traffic on a single Wi-Fi network | Not supported | Only apps that respect system proxy | HTTP, HTTPS |
| Per-app | Routing specific apps through different proxies | Username/password supported | All apps you select | HTTP, HTTPS, SOCKS5 |
| APN (mobile data) | Using a proxy on 4G/5G LTE | Limited (carrier-dependent) | All mobile data traffic | HTTP only on most carriers |
If you mainly need a proxy in your browser, start with Method 1. If you want certain apps (like Instagram, TikTok, or WhatsApp) to use a proxy, go with Method 2. For full mobile data routing, Method 3 is the only built-in option.
It is an intermediary server that enables a device to route internet traffic through another IP address before forwarding this traffic to the target server. When using a proxy for accessing websites and other online services, your IP address is masked (replaced with the proxy IP), which makes your internet access more secure, anonymous and private.
So, why use a proxy on android:
This routes your device traffic through IP addresses assigned to real home or mobile users. These proxies are reliable because mobile apps trust them more, especially when using mobile IPs. Proxy providers also offer way more IPs for residential proxies than any other type, giving users more freedom to choose a location that suits their use case.
An ISP proxy routes your traffic through IPs of servers running in ISP-managed datacenters. This makes their IP addresses more truth-worthy than IPs generated by cloud providers and hosting companies. ISP proxies also offer faster speeds since their IPs run in more performance-optimized hardware than residential proxies.
This type uses IPs addresses of cloud servers. These IPs are usually generated by cloud providers and hosting companies, so may not be trusted by some sensitive websites. Such IPs have higher chances of getting blocked than ISP-assigned IPs. Overall, datacenter proxies are cheaper and easier to scale, but this usually comes at the expense of being more vulnerable to IP bans.
Now that we have covered the basics, let’s get into the configuration steps for proxies on your device.
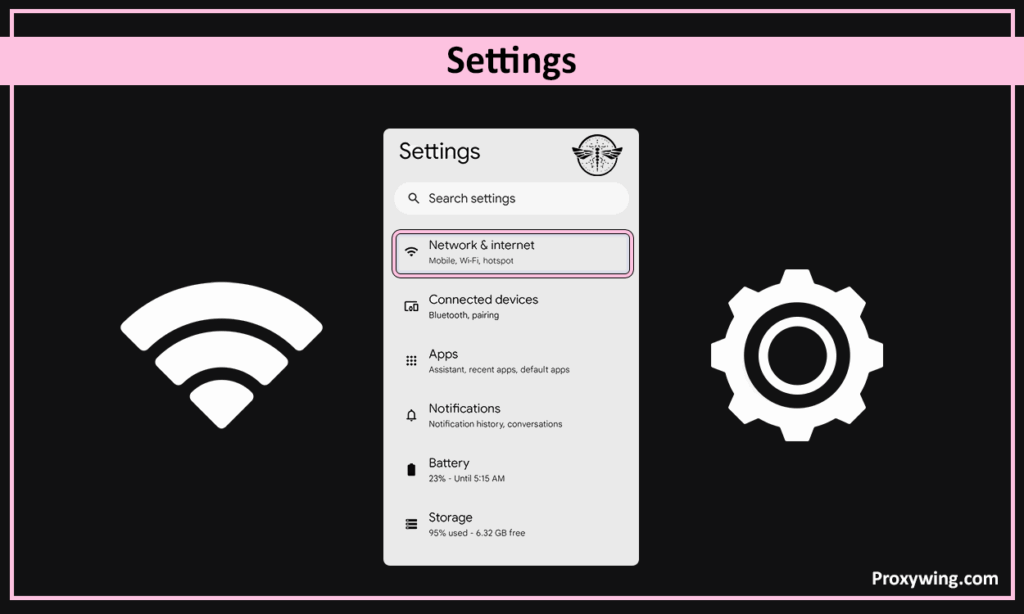
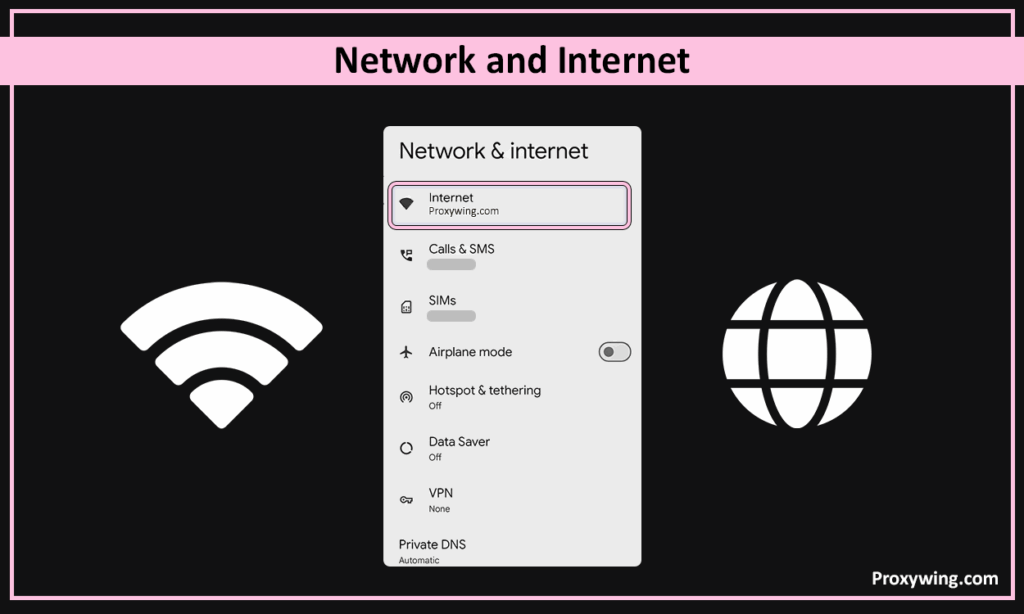
This method uses your device’s built-in Wi-Fi proxy settings. The steps we are about to share work on most phones and tabs, though menu names or steps may vary slightly by Android versions or brand.

At this point, your Wi-Fi network traffic will route through the proxy.
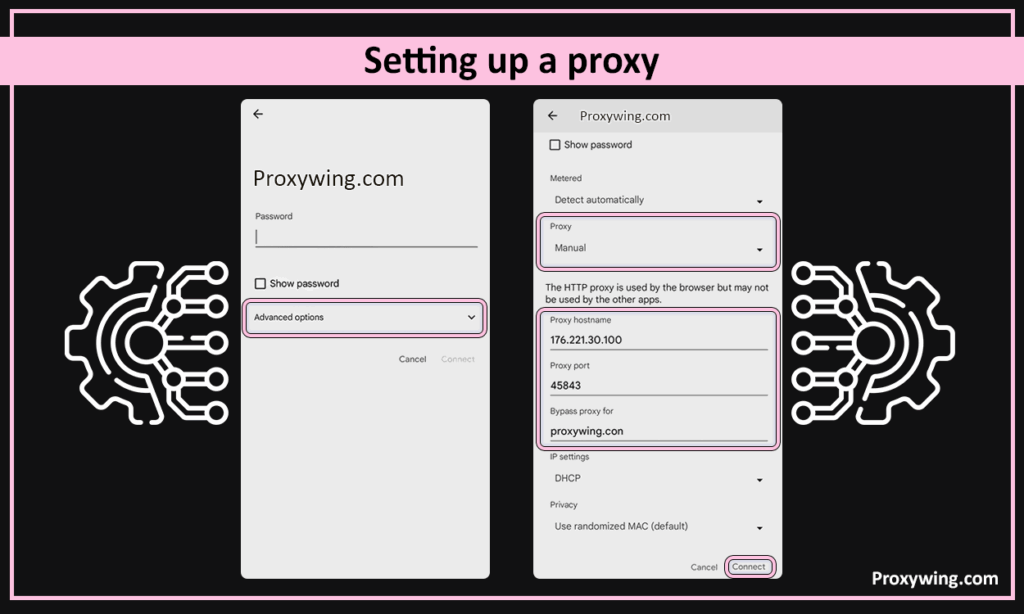
The built-in Wi-Fi settings do not support username/password authentication. So, if you need to use login credentials, the only options you have is using a proxy app that supports authentication, using a PAC file, or configuring proxy settings in the Access Point Name (APN) section.
Once Android proxy settings are configured, all traffic over that specific Wi-Fi network will use the proxy. Make sure your internet connections are stable to avoid network drops. Mobile data is not affected. You configure the proxy for mobile data through your APN settings.
The built-in Android Wi-Fi proxy supports only HTTP and HTTPS proxies. It does not support SOCKS5, SOCKS4, or UDP proxies natively. If your provider gave you a SOCKS5 proxy and you want to use it system-wide on Wi-Fi, the built-in settings will not work.
To use SOCKS5 on Android, you have two practical options:
The same limitation applies to authentication. Built-in Wi-Fi proxy settings do not have fields for a username and password, so if your proxy requires login credentials, you cannot use it through this method. PAC file auto-configuration is supported, but most commercial proxy providers do not issue PAC files.
Not all of them. The built-in Wi-Fi proxy is a system-level setting, but each app decides on its own whether to honour it. Most browsers (Chrome, Firefox, Edge, Kiwi) follow these settings, but many apps with their own network stack, including social media apps, banking apps, and some messengers bypass the system proxy entirely.
Here is what to expect:
If an app you need to route through a proxy ignores the Wi-Fi setting, you have three options: use a per-app proxy app (Method 2), set up the proxy inside the app itself if it supports it, or use a VPN-style proxy client. We cover the per-app method right below.
With this method, you will only need to use a third-party proxy app. This app will route your traffic through a proxy for the specific apps you choose. So, instead of routing all the traffic through a proxy, this method gives the flexibility to choose specific apps to use the configured proxy settings.
Here the steps you should follow when using this method:
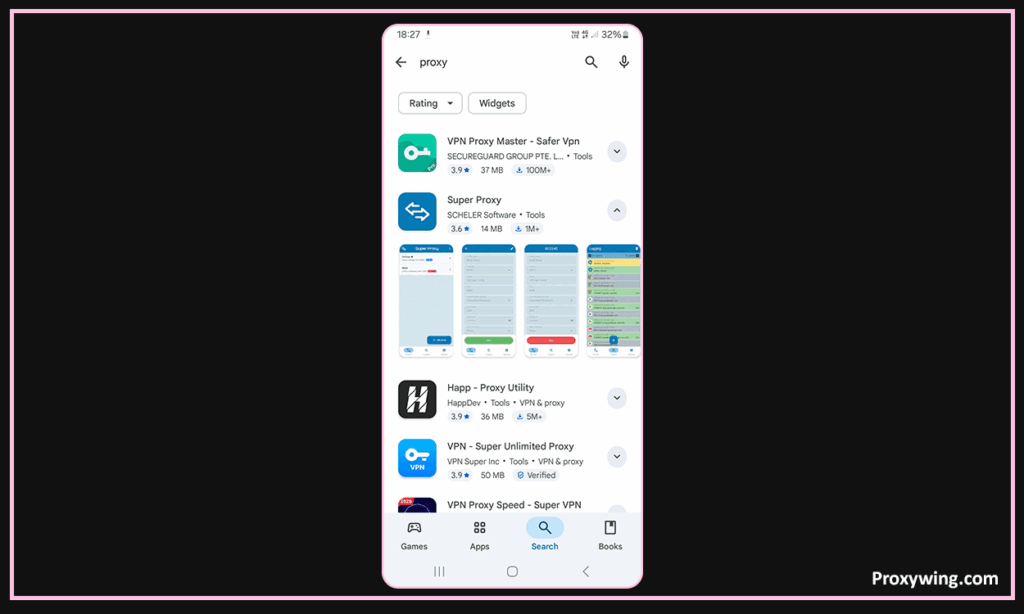
Launch the Google Play Store app on your device, search for a proxy management app such as Super Proxy and install it on your device. Launch the app once it is installed.
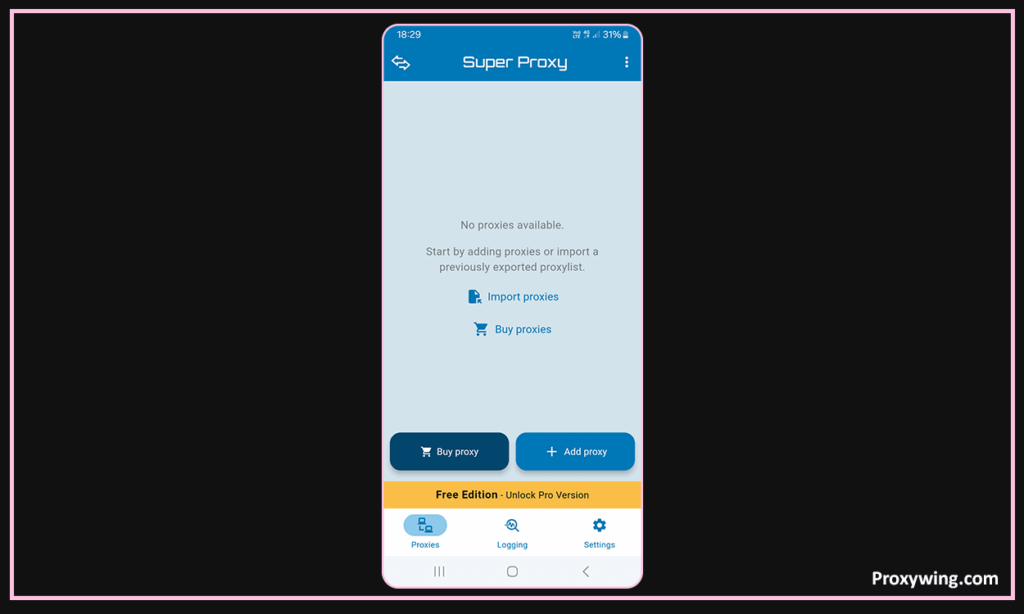
Within the proxy app, tap «Add Proxy» or «New Profile» and select the proxy type (HTTP, HTTPS, or SOCKS).
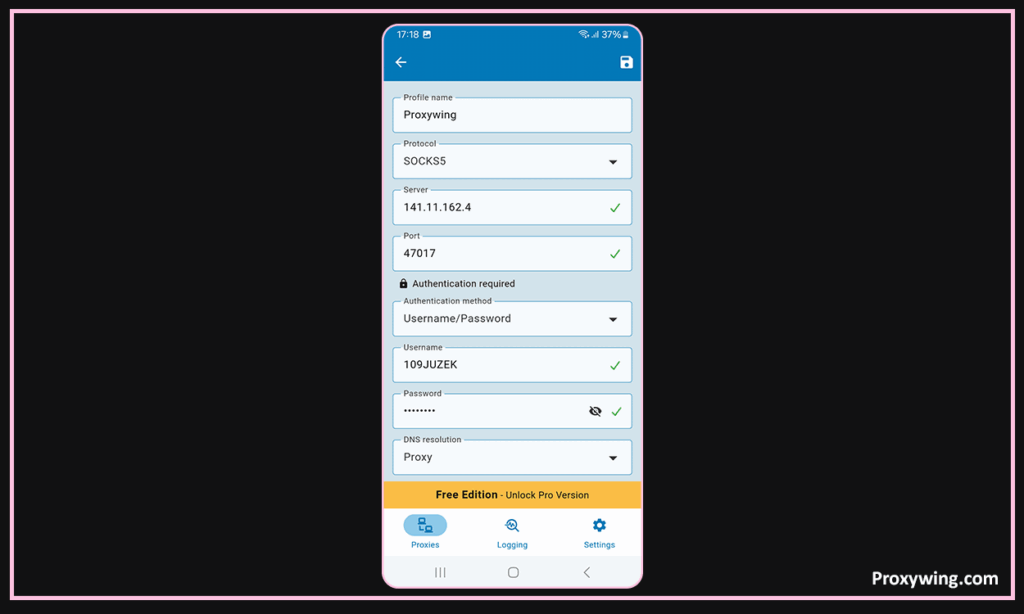
The next step now is typing in the proxy details, including the server IP address or hostname and the port. If authentication is required, enter the username and password.
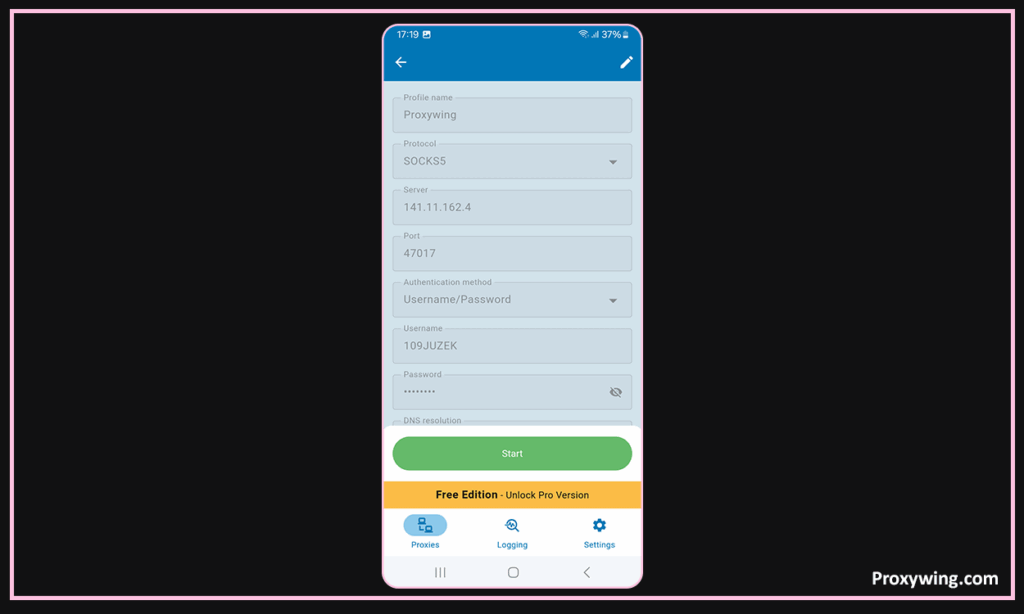
Save the profile and proceed to the next step.
Most apps give you several customization options, including:

After saving the settings in the app of device settings, you now need to test if the proxy works as expected. Use tools like our IP checker to confirm that your traffic is now running through proxy server. Confirm the IP address is not the same as that of your device IP.
Super Proxy and similar apps (such as Drony, Every Proxy, and ProxyDroid) route traffic by creating a local VPN service on the device. Inside the app you can fine-tune the configuration:
Note that Super Proxy does not currently route UDP traffic system-wide, only TCP. This means voice/video calls, some games, and apps that use QUIC may bypass the proxy or fail to connect. For UDP-heavy use cases, a dedicated SOCKS5+UDP solution or a VPN-style client is required.
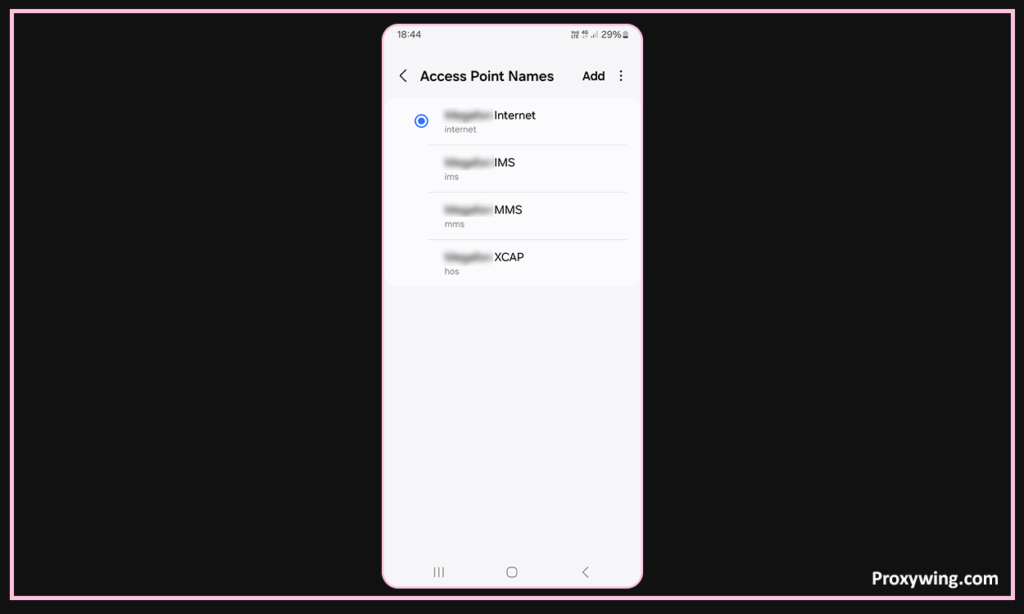
As stated earlier in this guide, you can also set up a proxy in mobile data settings. For most devices, this methods works only through APN settings using the steps below:
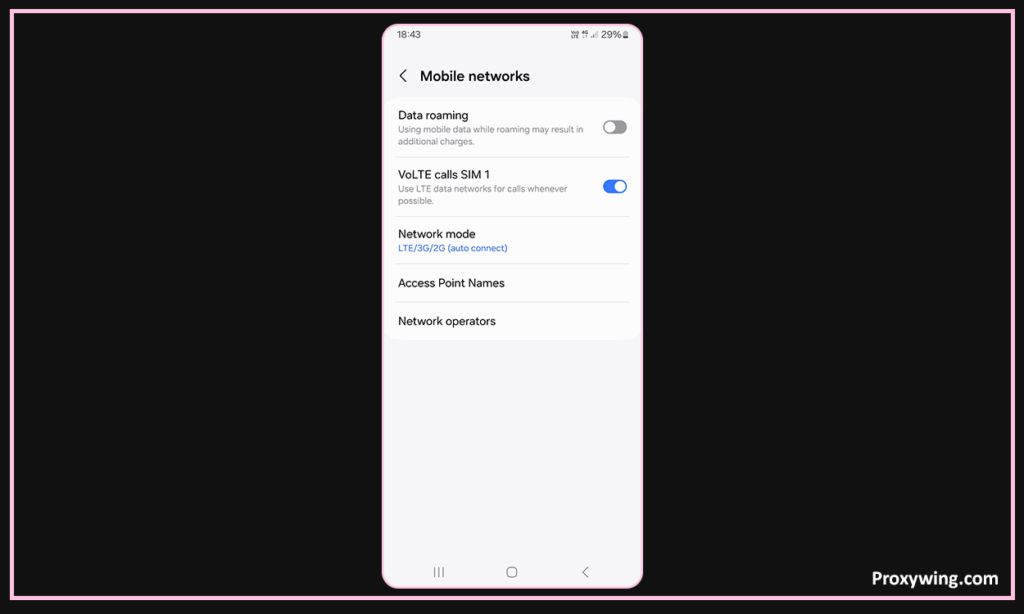
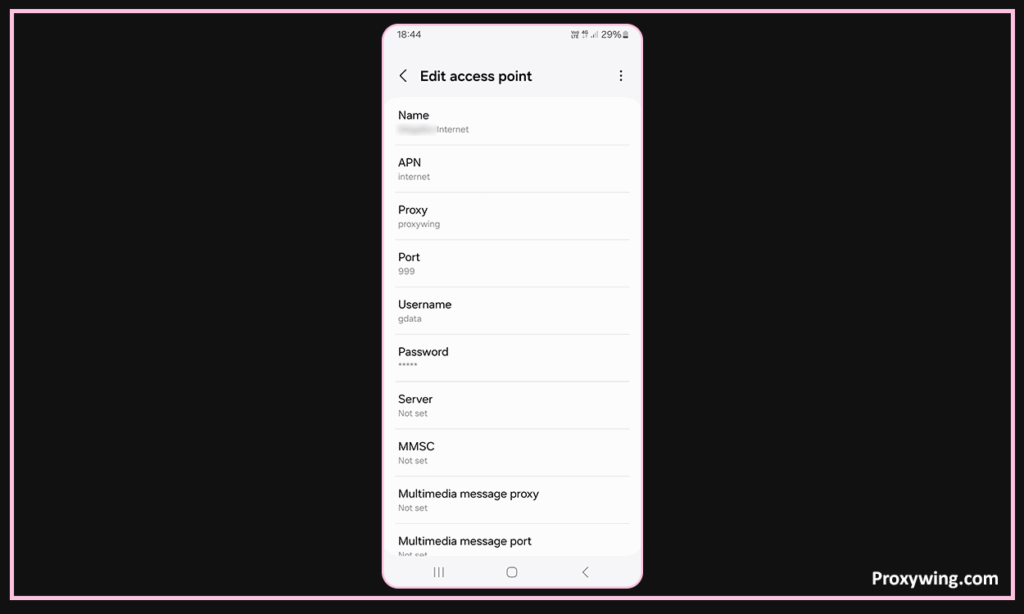
Important limitations:
Even though proxies work with mobile data, you need to be aware of these limitations:
Some of the most common reasons to set up a proxy on Android are managing multiple accounts on social platforms or accessing apps from a different region. Each platform behaves differently:
Both apps ignore the built-in Wi-Fi proxy settings and use their own network stack. To run Instagram or TikTok through a proxy, use a per-app proxy app (Method 2) and select Instagram or TikTok in the app list. For account management and avoiding bans, mobile (4G/5G) proxies tend to be the safest choice because they share IP addresses with thousands of real users on the carrier network.
WhatsApp has built-in proxy support since 2023. Open the app, go to Settings -> Storage and data -> Proxy, enable Use Proxy, and enter the proxy host. This is independent of the Android system proxy and uses WhatsApp’s own protocol.
Telegram also has native proxy support, including MTProto, SOCKS5, and HTTP. Open Settings -> Data and Storage -> Proxy Settings -> Add Proxy and enter the details. Telegram’s built-in MTProto support is the most efficient option for bypassing network restrictions.
YouTube and most Google apps respect the system proxy on Wi-Fi but may behave unpredictably on cellular networks. For consistent results, route them through Super Proxy with a residential or mobile proxy.
For platforms where account safety matters (multi-account management on Instagram, TikTok, etc.), avoid datacenter proxies, they are detected and flagged quickly. Use residential or mobile proxies instead.
Once your proxy is set up, whether through WiFi settings, a proxy app, or APN settings, you can now open your browser or app to start using the proxy. To confirm that the proxy is working, use an IP checking tool to confirm that the IP address location you are connecting with is different from your current location.
If you already use a proxy and need to check what it is set to, here is where to look:
The proxy hostname is either a domain (such as proxy.example.com) or an IP address (such as 192.168.1.10), and the port is a number between 1 and 65535. If you do not see any proxy configured anywhere but suspect one is active, check for installed VPN or proxy apps in Settings -> Apps, and look at the notification bar for a key or VPN icon.
To turn off a proxy:
After disabling, test by opening a browser and visiting our IP Checker — your original IP and location should appear again.
If something is not working after setup, the issue is usually one of these:
ERR_TUNNEL_CONNECTION_FAILED or similar errors. Either the proxy server is down, the credentials are wrong, or the port is blocked. Re-check the host, port, and login. Try a different proxy from your dashboard.Using proxies by ProxyWing on your devices can help improve privacy and bypass geo-limitations. However, to avoid issues along the way, you need to make sure you set them up properly following any of the methods we have shared. The right setup depends on whether you need Wi-Fi-only, per-app, or mobile data proxying.
If you are searching for stable, well-optimized proxies, ProxyWing offers:
Article written by:

CEO
Daniil founded Proxywing with a clear vision: deliver premium proxy solutions that businesses and individuals can rely on without compromise. His expertise in international business and B2B strategy drives the company's expansion across EU, US, and Asian markets, while his hands-on approach ensures that product quality — from 99% uptime to responsive support — remains the top priority. Daniil focuses on the big picture, refining company processes, identifying market opportunities, and integrating cutting-edge technologies to stay ahead of the competition. When he's not steering the company's growth, he channels his energy into exploring new business ventures and strategic partnerships.
All articles by author (58)This can happen since some apps may ignore system settings or use their own networking stack. Some apps also require direct connections for security. To resolve this issue, we recommend using a per-app proxy app or a VPN-style proxy solution.
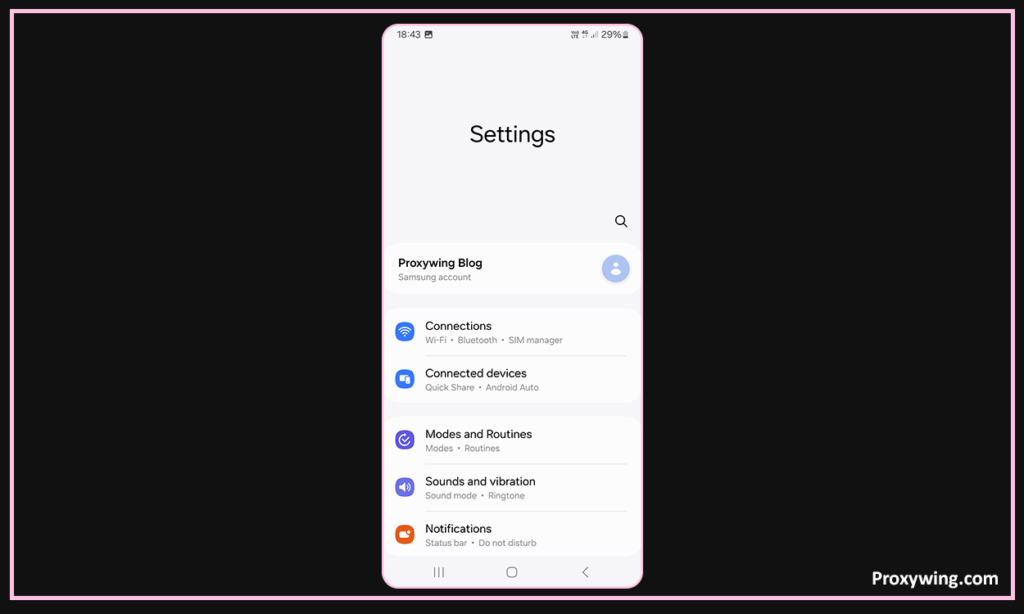
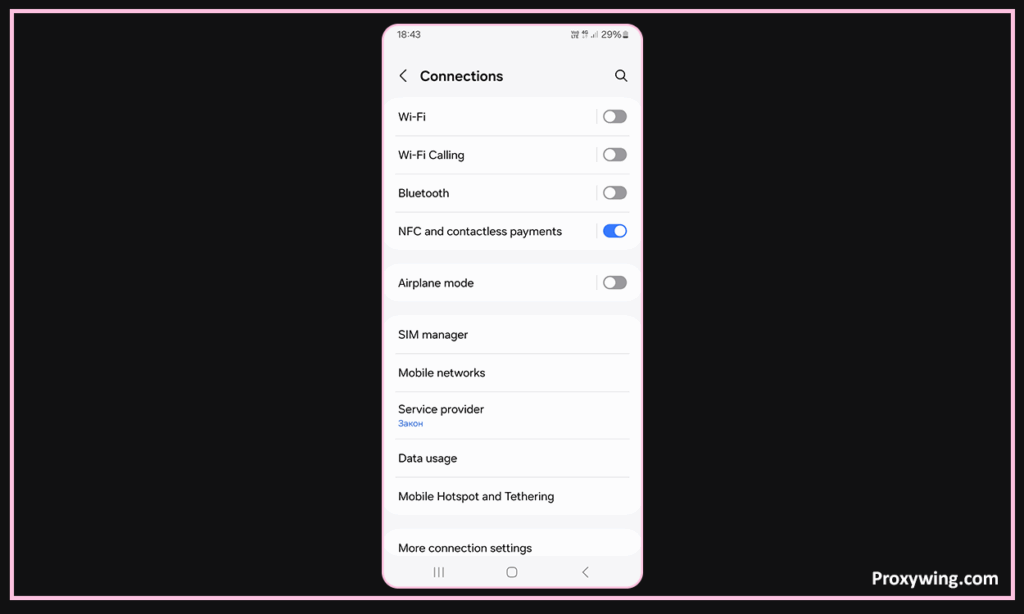
The Android proxy server address can be found in your WiFi network settings. Go to Settings > Network & Internet > WiFi and tap the active network. Tap on the gear icon and choose Manual > Modify network or Edit network under the advanced options. You should now see the Android proxy server details, including the IP or hostname and port number.
Not necessarily. If you use premium proxies from a trusted provider, your connection speeds will be maintained. In some cases you can even get a better connection. However factors like proxy type and distance from proxy server for Android can also affect performance.
Yes, if you use trusted providers and avoid free and public proxies.
Yes. This can be done by using third-party proxy apps that allow per-app routing.
No. The built-in Wi-Fi proxy only supports HTTP and HTTPS proxies. For SOCKS5 you need a per-app proxy app such as Super Proxy.
No. The setting is system-level, but each app chooses whether to use it. Browsers usually follow it; many social, banking, and game apps do not. Use a per-app proxy app to force routing.
Yes, through APN settings, but with limits. Most carriers only allow HTTP and many do not support authentication. A per-app proxy app works on mobile data with no carrier restrictions.
The built-in Wi-Fi proxy does not store usernames or passwords, so the browser asks for them on each request. Use IP whitelisting or move to a per-app app.
Chrome on Android uses the system Wi-Fi proxy. There is no separate proxy setting inside Chrome itself. Configure the proxy via Wi-Fi settings as shown in Method 1.