Manual Proxy Setup for WiFi: How to Configure It Step by Step
21.07.2026 12 min
Using a proxy allows you to hide your real IP address and change your geolocation to bypass restrictions. In previous articles, we discussed how to use proxies with browsers like Chrome, Yandex, and Opera built on Chromium, as well as how to work with proxies in Firefox. Unfortunately, the methods described do not allow for quick proxy switching if your work requires multiple IPs. A solution to this problem is using the SwitchyOmega extension. This extension is open-source, and its code can be found on their GitHub page. Our editorial team trusts this extension; upon reviewing the code, we did not find any capabilities to steal traffic or your personal data. In this article, we will detail how to set up and use proxies with the SwitchyOmega extension.
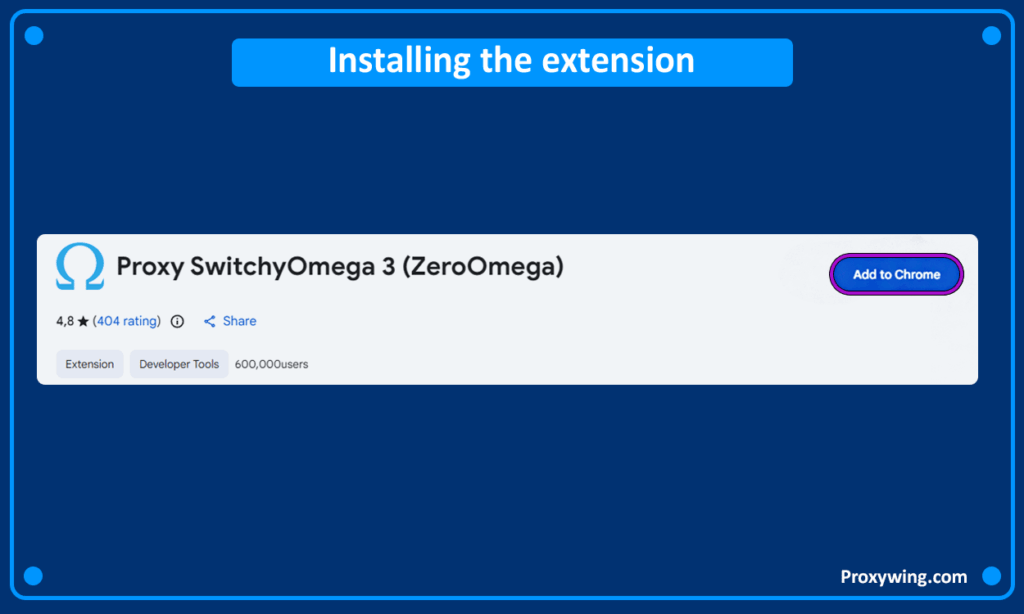
Open your browser and install the extension from the extension store.
SwitchyOmega 3 (ZeroOmega) for Chrome, Firefox, Edge.
We will demonstrate the setup using Chrome; the process is similar across different browsers.
Confirm the installation and skip the built-in guide by clicking «Skip guide»

On the left side, you can create a new profile or select an existing one for proxy settings.

Click «New profile» to create a profile. For working with static proxies, select «Proxy Profile» and come up with a name for the profile.

Next, select the desired profile and enter your proxy details. In the «Protocol» column, choose the protocol that will be used with this profile. «Direct» means a direct connection without a proxy. In the «Server” field», enter the proxy IP address, and next to it, the proxy port.

If the proxy requires authentication, click on the lock icon on the right side of the screen. Enter the proxy username in the top field and the password below. Click «Save changes». Our editorial team does not recommend using free proxies, as there is a high chance of data leakage. Individual proxies with authentication are a safer option.

Under the proxy settings in the «Bypass List» section, you can enter addresses for which the proxy will not be used when connecting. Enter each address on a new line.

On the left side, after configuring the proxy, click «Apply changes» to save the changes.

To avoid losing saved profiles and entered data, save a file with the settings, which you can import into other browsers or restore if the information gets deleted. To do this, go to the «Import/Export» section on the left side of the screen and click «Make backup» to save the configuration. If you need to restore the data, click «Restore from file».

The proxy is set up! Now, when connecting to a site, you can click on the extension and choose which profile you want to use. If you want to disable the proxy, click «[Direct]». To return to the settings, click «Options» at the bottom of the panel.

At Proxywing, we understand the need for security and anonymity! It is important to us that every client is satisfied. We offer proxy servers at competitive prices suitable for both personal use and business needs. All our proxies are compatible with browsers, and importantly, all our proxies are private, no one else will use them except you.
Sing up today and experience the quality of our services!
Article written by:

CEO
Daniil founded Proxywing with a clear vision: deliver premium proxy solutions that businesses and individuals can rely on without compromise. His expertise in international business and B2B strategy drives the company's expansion across EU, US, and Asian markets, while his hands-on approach ensures that product quality — from 99% uptime to responsive support — remains the top priority. Daniil focuses on the big picture, refining company processes, identifying market opportunities, and integrating cutting-edge technologies to stay ahead of the competition. When he's not steering the company's growth, he channels his energy into exploring new business ventures and strategic partnerships.
All articles by author (58)