



How to Set Up a ProxyWing Proxy in Firefox
13.09.2024 2 min
Chrome normally uses your computer’s proxy settings. If you have an HTTP proxy address and port, you can enter them in Windows or macOS, then check which IP address a website sees when you visit it in Chrome.
Other apps that use the same system settings may pick up the change. If you want a proxy only in Chrome, use a browser extension instead. ProxyWing Proxy Manager setup guide.
Sign in to your ProxyWing dashboard and open your proxy product. These steps use an HTTP proxy, which can also handle HTTPS websites.
domain:port:username:password, then click Copy Proxy. If you copied several rows, use the row for the proxy you want to set up in Chrome.domain:port:username:password as the credential format. Click Generate, then copy one row for Chrome.For a sample row such as
192.0.2.25:8080:demo-user:demo-pass, enter192.0.2.25in Address (Windows) or Server (Mac), and8080in Port. Keep the last two values for Chrome’s sign-in prompt. Use the values from your own row, including the hostname if your plan supplies one.
Before switching the proxy on, open the IP Checker in Chrome and note IP info → IP address. Keep the tab open. If you use IP authorization, confirm your direct connection’s public IP is on your ProxyWing allowlist. Take a screenshot of any existing system proxy settings so you can restore them.
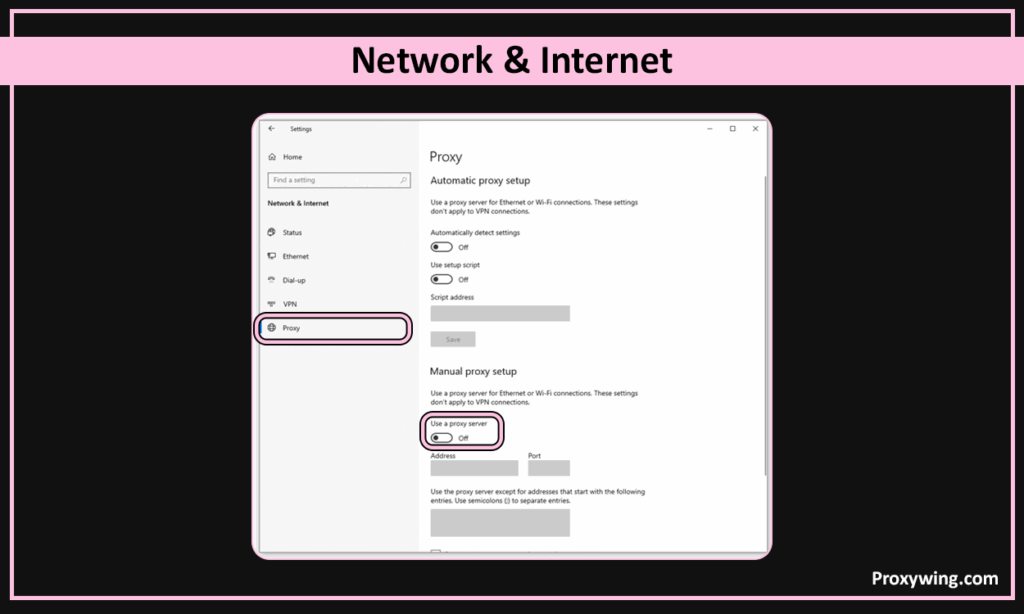
chrome://settings/system and select Open your computer’s proxy settings. You can also open Settings → Network & Internet → Proxy in Windows.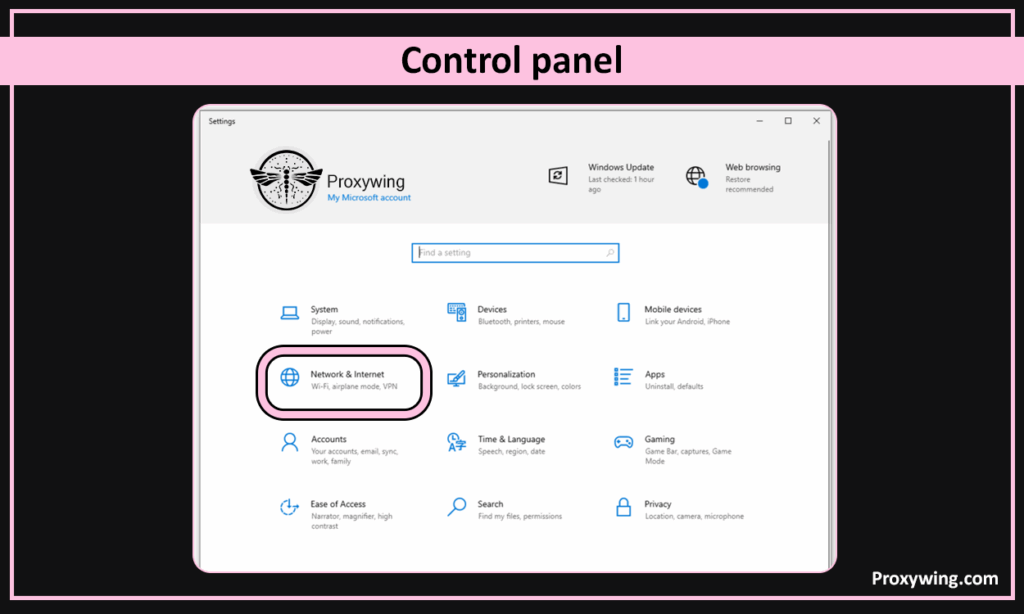
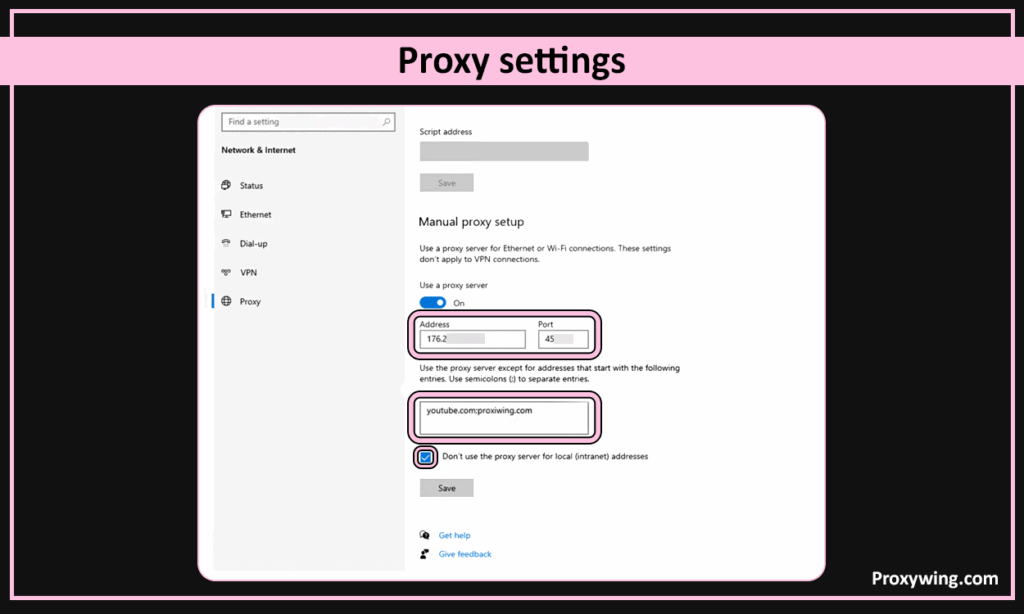
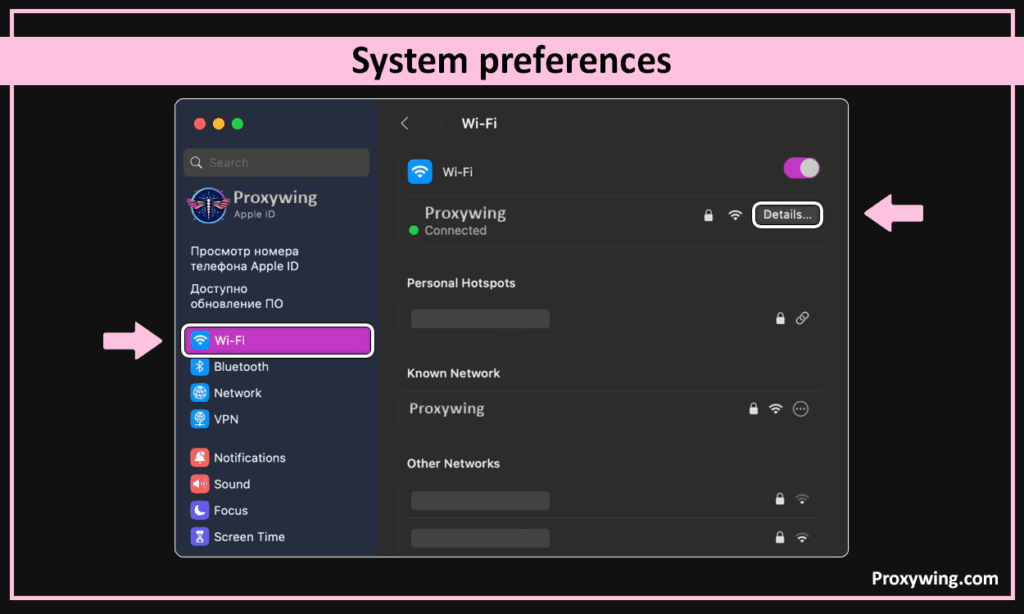
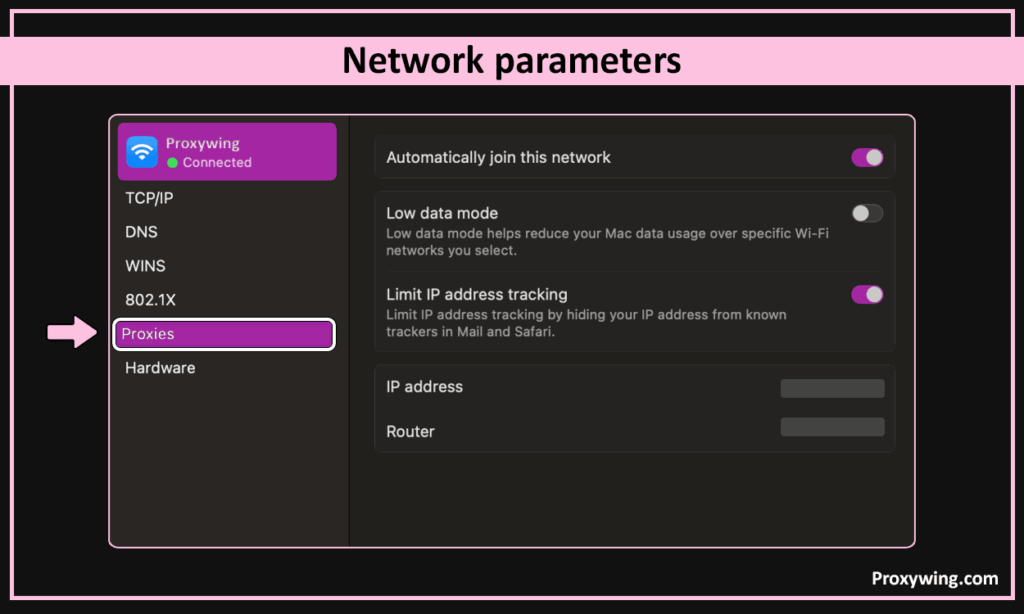
On the reloaded IP Checker page, read IP info → IP address again. For a static proxy, compare it with the exit IP your provider assigned. A match tells you that the checker saw the expected address for this request. The server address you typed into Settings may be a gateway hostname, so use the provider’s exit IP for the comparison.
With a rotating proxy, successive requests can show different addresses. Compare the result with the exit or session details your provider makes available. A change from your original IP alone cannot identify which proxy handled the request.
Chrome still shows the original IP.
On a Mac, check that you edited the active network connection and enabled the setting for HTTPS sites. On either system, check whether the test site is on the bypass list. If a Chrome extension manages your proxy, check which configuration is active in the extension, then reload the page.
Chrome keeps asking for a username and password.
Use the proxy username and password from the copied row. The dashboard has its own login. Check that you copied the HTTP connection details. Chrome’s built-in SOCKS5 client cannot sign in with a username and password. If the endpoint uses IP authorization, check the allowlisted address against the public IP you recorded before setup.
Pages stop loading or Chrome reports ERR_PROXY_CONNECTION_FAILED.
Check the server and port together against the HTTP endpoint in your provider’s connection details. Providers can assign different ports to HTTP and SOCKS. If you need to get back online to look up the correct values, restore the previous settings below.
Windows. Return to Network & internet → Proxy → Manual proxy setup. On Windows 11, select Edit. If the manual proxy was off before, turn off Use a proxy server and save. If you replaced another proxy, restore its address, port and exceptions from your screenshot.
macOS. Return to Network → your active connection → Details → Proxies. Restore each switch and field you changed, then click OK. Reload the checker once more to see which address your restored connection uses.
Article written by:

Product & Support Operations Lead
Built Proxywing's support department from scratch — documented workflows, clear escalations, consistent quality. Now bridges the CEO and engineering, keeping infrastructure projects on track.
All articles by author (3)
