
Best Proxies for Janitor AI in 2026: Top Picks
26.07.2026 10 min
In this guide, we’ll walk you through the steps to configure ProxyWing proxies within the MuLogin browser. Follow the instructions below to ensure a smooth and secure integration.
ProxyWing is a provider of premium IPv4 proxies of three types (residential, datacenter and isp). For ProxyWing, the main priorities are the security of your data, stable operation, and availability from any regions.
ProxyWing is great for web scraping, SEO promotion, traffic arbitration, and multi-account management, ensuring the efficiency and security of online tasks.
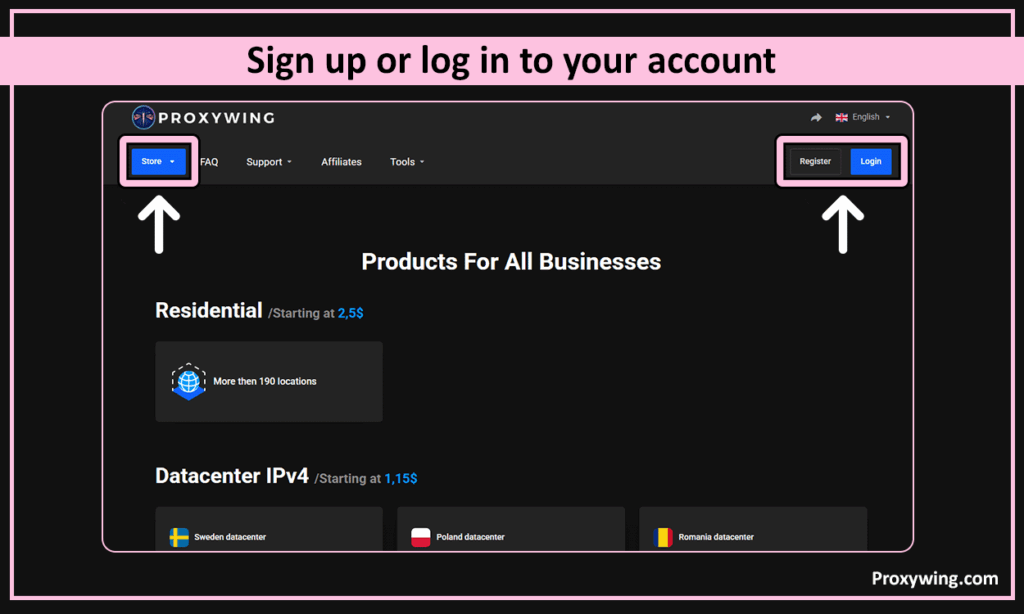
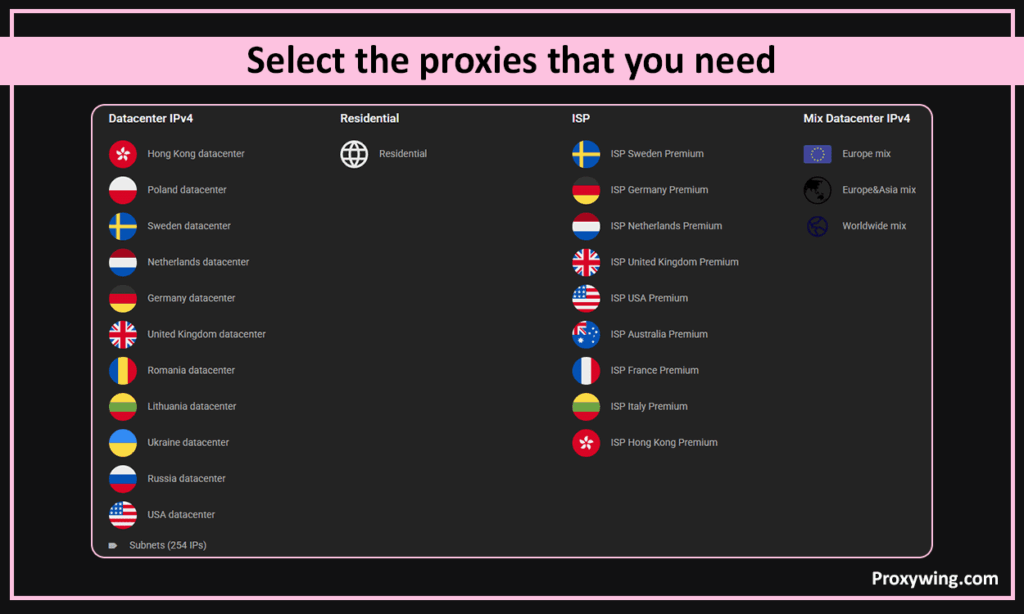
2. Click on «Store», select the required proxy type (residential, datacenter, or ISP) and add it to the shopping cart. After payment, the necessary proxies will immediately appear in your dashboard.
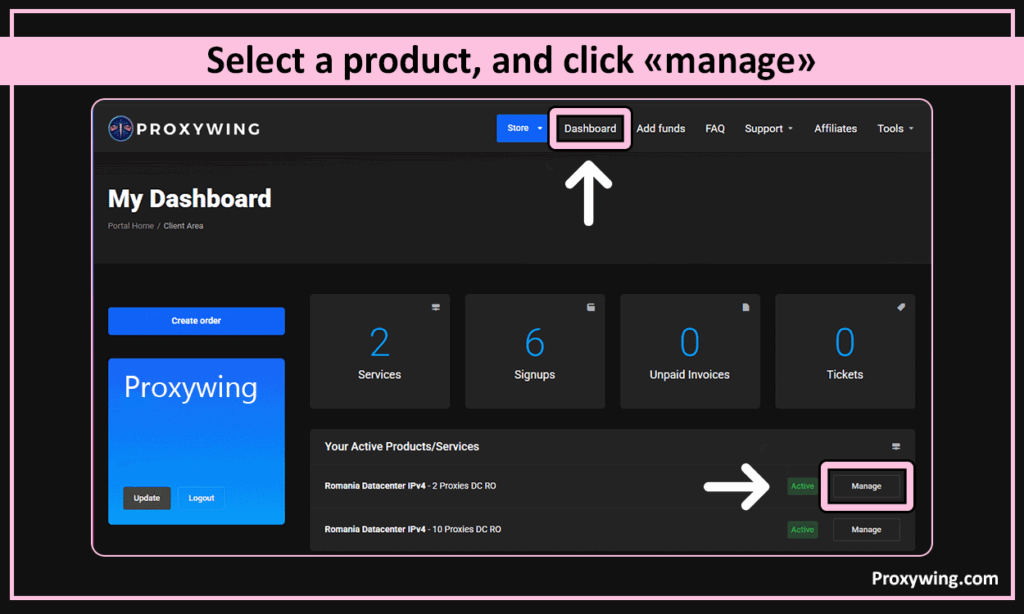
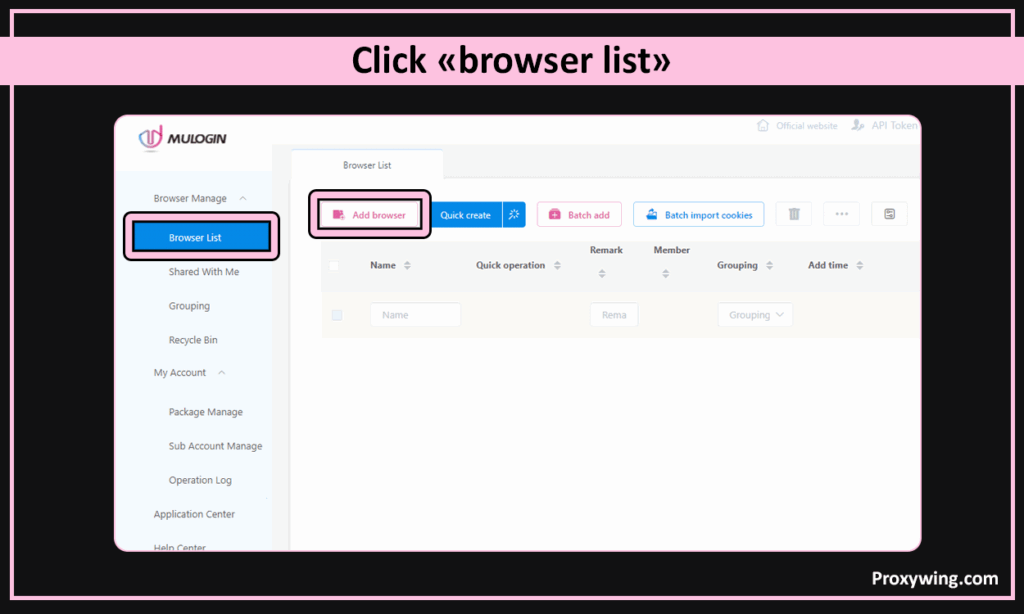
3. Open your dashboard, select a product, and click «Manage»
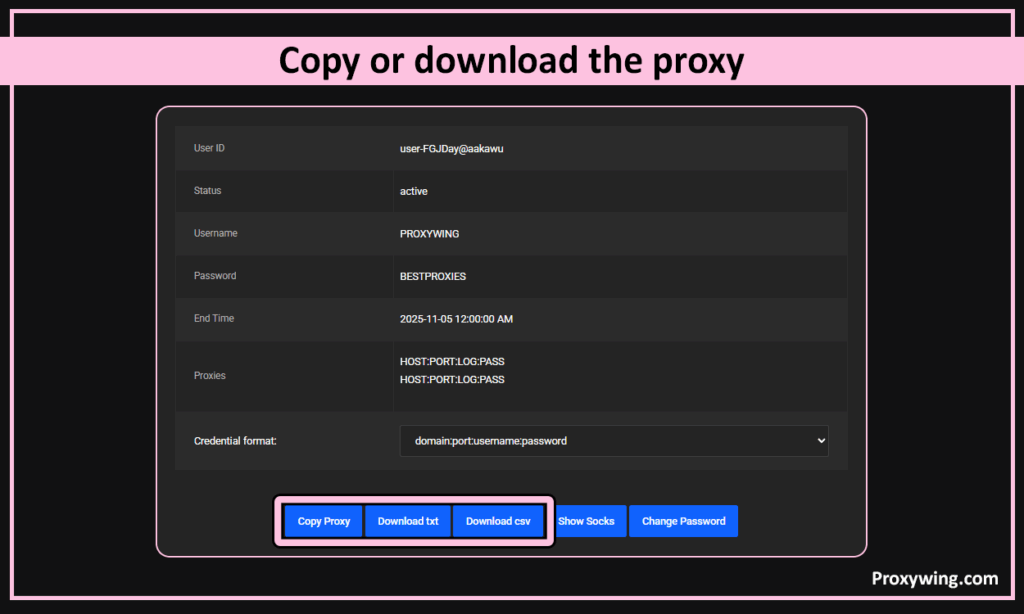
4. Copy or download the proxy using the buttons at the bottom. HOST:PORT:LOG:PASS — this is the proxy format used on the ProxyWing website.
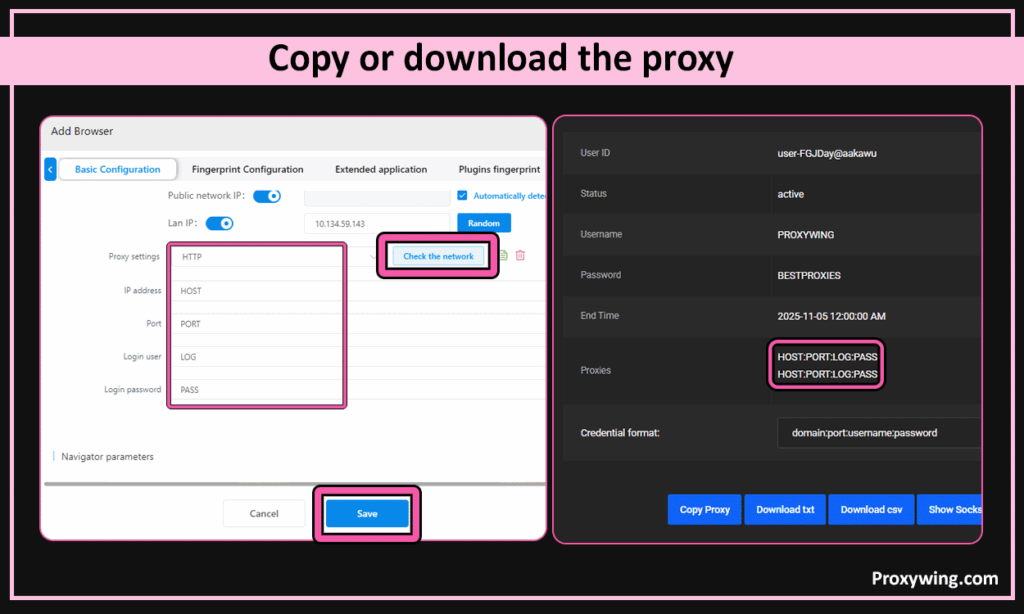
2. In the «Basic configuration» section. Choose at «Proxy settings» protocol HTTP or SOCKS5 and copy the information from the ProxyWing dashboard (proxy IP, proxy port, proxy user, and proxy password) into the appropriate fields.
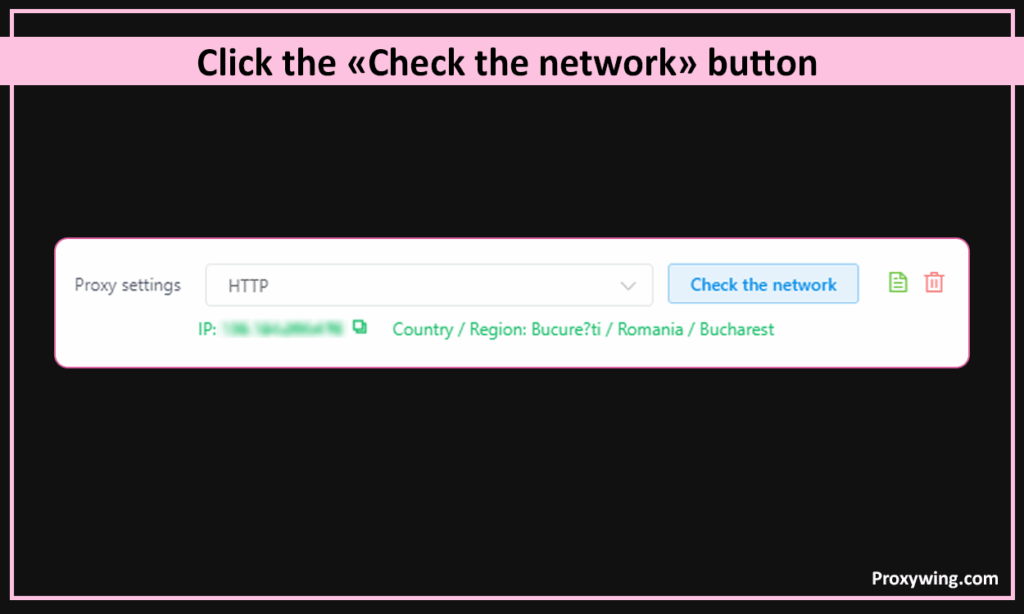
3. Click the «Check the network» button. MuLogin will confirm the test was successful and display the proxy’s IP address and location. Click «Save» to save your browser profile.
Article written by:

Product & Support Operations Lead
Maksimilian built Proxywing's support function from the ground up, turning ad-hoc processes into a structured, self-sufficient department with documented workflows, clear escalation paths, and consistent service quality. Today he operates as the coordination layer between the CEO and engineering teams, translating business priorities into actionable tasks and keeping proxy infrastructure projects on track. His academic background in psychology — with formal training in research methodology and data analysis — sharpens his approach to process design and user feedback interpretation. Outside of work, Maksimilian explores the intersections of human behavior, decision-making, and product thinking.
All articles by author (62)