Manual Proxy Setup for WiFi: How to Configure It Step by Step
21.07.2026 12 min
Gmail is the most popular email service with billions of users worldwide. However, this mailing service is not available in every country due to government policies and other network restrictions. That is why using a Gmail proxy is necessary for users in such countries. Besides bypassing geo-restrictions, proxies also enhance privacy and anonymity when accessing Google Mail and any other online service.
In today’s guide, we will discuss how to set up and use proxy with Gmail, including the best types, the setup process, and more. By the end of this guide, you will have all the information you need to get started using proxies when accessing this Google mailing service. Let’s delve in right away!
Using proxies helps hide your real device IP address, allowing to enjoy benefits such as:
A proxy for Gmail lets you route Google Mail traffic through a fixed location, which makes it useful for teams operating across borders or users in regions where Google access is restricted. Users in countries like Iran, Syria, and Turkmenistan can switch their IPs to different regions to access this mailing platform with no restrictions.
Using the same IP across multiple Gmail accounts signals overlap to Google. A dedicated proxy IP per account reduces the risk of flags or linked-account detection. If your work requires switching between several accounts, you will need to use a proxy to avoid any chances of account linking that could lead to restrictions or bans.
A proxy for Gmail masks your real IP between your device and this emailing service server, making it useful on shared office networks, public Wi-Fi, or monitored environments. It also prevents Google from logging your real IP address when using their mailing service.
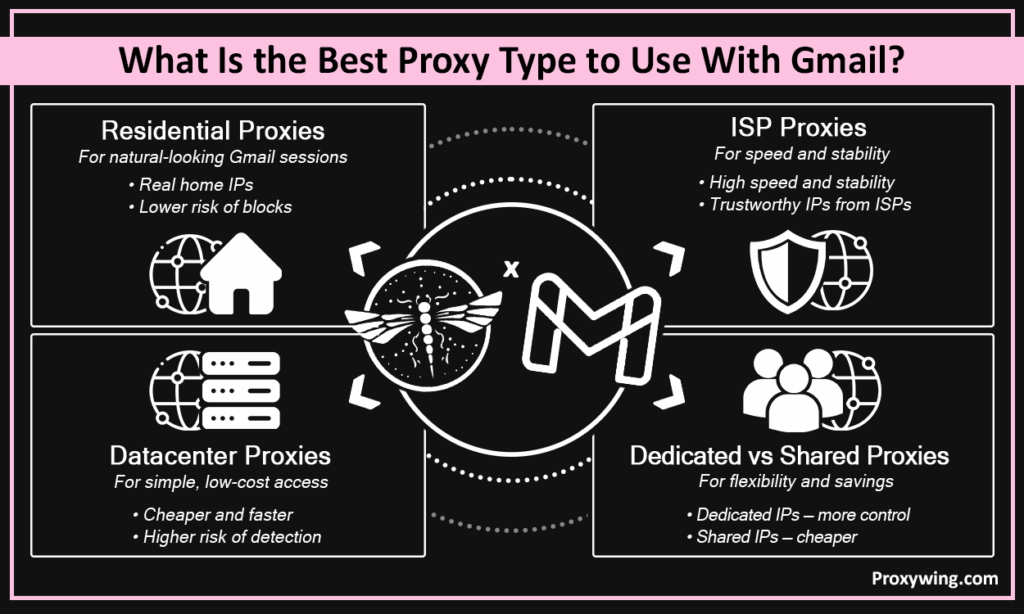
The type you choose will have a significant impact on the overall experience you get when using proxies. Let’s explore the different types, including their pros and cons.
A residential proxy will route your traffic through IPs of home devices owned by real users. These are typically real residential ISP-assigned IPs, making sessions appear organic, significantly reducing the chances of IP blocks. This type is the best for sensitive account activity and long sessions, especially on a platform like this that often blocks access when any unusual activities are detected.
ISP proxies offer datacenter-level speeds with ISP-assigned IPs. This makes them a reliable, cost-effective pick for stable Google Mail connections. They are also relatively cheaper than residential proxies and offer static IPs that are necessary for account management tasks.
Datacenter proxies work for basic access but are flagged by Google more frequently since they rely on datacenter IPs that most online platforms don’t trust. Despite being cheap and fast, datacenter IPs are not ideal for active account management.
Shared proxies assign the same IP address to several users, so each carries risk from the activities of others on the network. Dedicated proxies give you exclusive IP use, making them the safer choice for Google Mail. Sharing proxies leads to slower and unreliable connections when compared to using dedicated ones.
Your provider will supply a host IP, port, and login credentials. Have all four ready before configuring any device. Some proxy providers offer both IP whitelisting and username/password authentication. In the case of IP whitelisting, you won’t need a username and password.
HTTPS or SOCKS5 are preferred for Google Mail since they both support encrypted, stable connections, which is crucial for privacy. Avoid plain HTTP connections as they don’t encrypt traffic and are frequently blocked by most platforms.
Switching countries or regions between sessions triggers Google’s security checks. Stick to one location per account to avoid frequent interruptions like re-authentication triggers and re-captchas caused by random IP changes.
Setting proxies in Chrome is the fastest way you get started using proxies on your device. Let’s walk you through the set up steps:
Install a reputable extension like Proxywing Proxy Manager from the Chrome Web Store. Avoid unknown tools that may log your data. Take time to look at the reviews and ratings of these extensions and ensure to choose those that have good ratings and reviews.
Create a new proxy profile in the extension settings and enter your IP, port, protocol, username, and password. No need for username and password if you chose IP whitelisting during purchase.
After inputting the server details, select your configured profile from the extension menu to activate it before opening Google Mail.
Log in normally and complete any verification prompt. Don’t switch proxy profiles while the session is active. For account management, you can create different profiles — with each account having its own profile. After these configurations, you can now seamlessly use proxy with Gmail.
On your Windows machine, go to Settings > Network & Internet > Proxy and scroll to Manual proxy setup.
Toggle on Use a proxy server and enter your server IP and port. Windows does not offer the fields for entering username and password. Credentials are only prompted when you first try to access internet services through an authenticated proxy
Click Save, open the Google Mail app, and confirm pages load correctly. You may also use an IP check tool to ensure your traffic is correctly being routed through the server IP address you set up in step 2.
Return to the same settings page and toggle off Use a proxy server when done.
Connect to the target Wi-Fi network first. Android proxy settings apply per WiFi network, not mobile networks. It is only a few Android OEMs that support proxy set up within their APN settings.
Long-press the connected WiFi network, tap Modify Network > Advanced Options, and switch Proxy from None to Manual. This allows users to manually enter the server details acquired from the provider.
Enter the server details, including the IP address or hostname and port into their respective fields.
If credentials are required, authenticate through the browser or use a proxy app that supports username/password login.
Open Google Mail and confirm the connection is stable.
On your iOS mobile devices, go to Settings > Wi-Fi and tap ⓘ next to your active network. Scroll to HTTP Proxy.
Tap the Manual option and enter your server details, including the IP address, port, and credentials (username and password) if required.
Save settings, open Google Mail, and confirm it loads correctly.
Visit IP look websites like proxywing.com/ip-check and confirm the displayed IP matches your remote server IP before logging in. If still shows your device’s IP, go back to the set up steps we shared earlier and ensure everything is well configured.
Log in and verify that the inbox loads, emails open, and attachments work without issues. You may test this using various web browsers to eliminate browser specific issues.
Google Mail may prompt phone or email addresses verification after an unfamiliar IP login. Keep recovery options updated to complete these quickly. You must also avoid randomly switching IP addresses to reduce the frequency of these security prompts.
ProxyWing offers the core requirements for reliable Gmail proxy use, including clean IPs, sticky sessions, and city-level targeting — all from $0.90/month. It is also one of the top-rated providers on TrustPilot, with hundreds of five stars reviews — a clear indication that past users love their services. Providers offering a similar experience usually charge way more than we do.
Whether you’re managing multiple Google Mail accounts, maintaining location-consistent access, or running outreach workflows, ProxyWing gives you the infrastructure to do it without IP conflicts or session instability. Get started today with plans starting from as low as $0.90/month.
Article written by:

CEO
Daniil founded Proxywing with a clear vision: deliver premium proxy solutions that businesses and individuals can rely on without compromise. His expertise in international business and B2B strategy drives the company's expansion across EU, US, and Asian markets, while his hands-on approach ensures that product quality — from 99% uptime to responsive support — remains the top priority. Daniil focuses on the big picture, refining company processes, identifying market opportunities, and integrating cutting-edge technologies to stay ahead of the competition. When he's not steering the company's growth, he channels his energy into exploring new business ventures and strategic partnerships.
All articles by author (58)Yes, Google has advanced systems that can detect proxy usage. Google Mail can flag proxy IPs, especially shared datacenter IPs. Dedicated residential or ISP IPs reduce this risk significantly since they rely on ISP-assigned IP addresses.
No, free proxies are generally not safe. Free proxies often log credentials and lack encryption. Avoid them for any account-sensitive activity since they may expose your sensitive data to untrusted parties.
You can, but it is not recommended. Using the same IP across multiple accounts can trigger Google’s linked-account detection. If you have more than one account, use a dedicated IP to manage each.
Google Mail flags logins from unfamiliar IPs as a security measure. Complete verification using your recovery options. You should also avoid switching IPs mid-session to reduce how often it triggers.